[Unreal 5] Making a Metal Slug Camera System

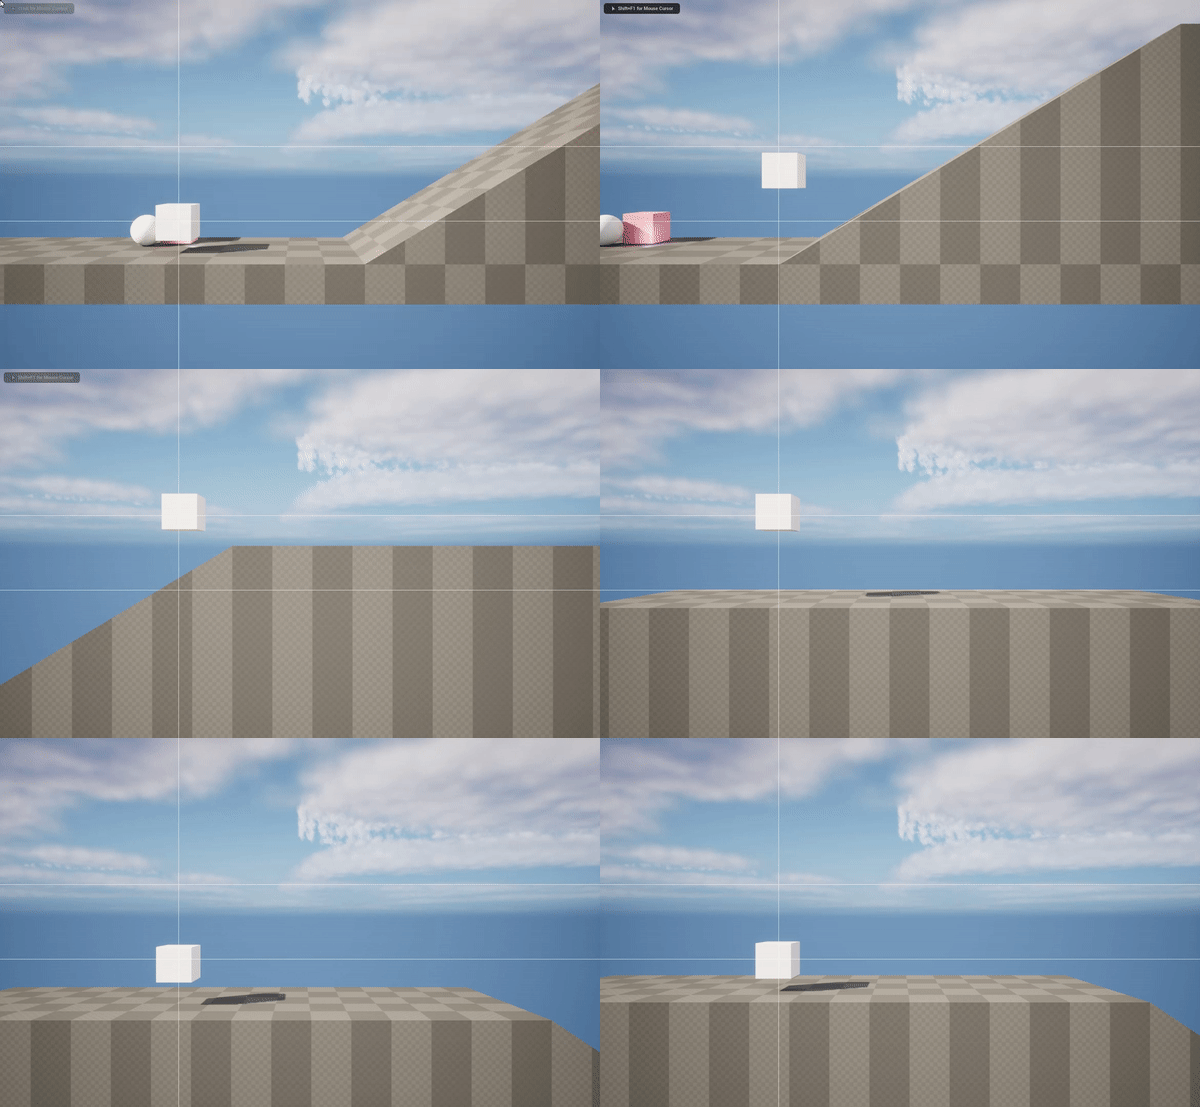
Demo of the camera system in action. The white line represents active thresholds to scroll.
Preface
Metal Slug is one of my favorite arcade game of all time (though I’ve only played it emulated). For an upcoming project that I’m working on, also my first Unreal project, I wanted to implement a similar system but in 2.5D.
Metal Slug’s Camera System
In Metal Slug (I’ll abbreviate it as MS), most of the time the camera seems to be only moving towards the right as the player progress, but this is not the case. In certain areas, it allows the player to still move within a bound area that is larger than the camera’s play space.
I first tried some Blueprint solutions that would move the camera along a fixed spline track, but after some thinking and replaying MS3 I realized that this doesn’t really work, at least not on its own. Across Metal Slug, I’ve noticed that the camera commonly are in one of three states:
- Forward Scrolling - Player must move forward, and the camera will only move forward. Vertical tracking of the player still occurs. This needs to support “forward” being either left or right to allow for more interesting level design.
- Bounded - The camera is bounded to a small area, or an area so small that no movement is possible. It will continuously track the player as they approach the screen’s threshold
- Auto Scrolling - The camera continuously move forward in the environment at a fixed speed, while the player either must keep up by foot, stand on some kind of moving vehicle, or is piloting a moving vehicle that is already moving forward. Forward can either be to the right or up. Auto Scrolling up will basically be a shmup (shoot’em up) at that point.
Something I’ve noticed that the threshold for scrolling varies between levels. For example, in MS3, the first level scrolls as soon as the player crosses a 30% screen-space threshold, while the second level needs the player to be almost at the center of the screen before it can start scrolling.
Given that the second level is a zombie level where most enemies do not have long ranged attacks, this design decision was probably made to force the player to be closer to the enemies as they come from the right side of the screen.
Getting The Camera To Move
First Iteration
For the first iteration, I have the level setup such that it is laid out along the X axis, and placed the camera looking at the level from the side. I tried to check for the player’s screen-space X coordinate and moving the camera directly such that they stay on the left side. This works, but the movement is jumpy and inconsistent using a constant scroll speed offset.

However, if we instead take the difference between the player’s screen-space position % and the desired threshold and use that to scale the scroll speed, while clamping it, we then get the smooth camera movement that we want

However, this still only supports moving in a single direction, we want the screen to be able to move left and right, as well as up and down for levels with slopes.
For supporting both left and right scrolling, I made an Enum that has all 4 directions, but only used the left and right for the prototype.

Second Iteration
I built a Blueprint pawn that contained the following components
- Camera Path Spline
- Scene
- SpringArm
- Camera
- SpringArm
- Scene
The idea is to define the path the camera would take with the root spline component, then use the Blueprint to program how the camera should move and track the player. Now, instead of using a single camera pawn and trying to build an entire level around it, we can just use multiple pawns with disconnected splines of any length. When certain criteria are reached, we can then use Set View Target With Blend in a CameraManager class to smoothly blend between each camera pawn; such as when a trigger volume is reached.
- This will allow for easy implementation of branching paths. For instance, we can have two separate trigger volumes on two different paths, and each will make the camera manager switch to a different active camera.
- At the beginning or end of the spline, the camera will naturally be stopped, so this handles bounding the camera’s movement in most scenarios.
- Having splines define the main path the camera will take allows us to build tools to preview the level without having to run a game simulation. We’ll touch on this later.
Scrolling By Moving Along The Spline
I defined 4 different thresholds for each side of the screen, each toggle-able with its own threshold for scrolling. I can then make each type of camera movement by configuring these variables. For example, forward scrolling can be achieved by simply toggling the left threshold off, while keeping the other thresholds on, so the player can move to the right with vertical tracking. We will worry about bounding the camera to a specific area later.
I made a struct that allows toggling of scrolling on each side of the screen as well as adjusting their individual thresholds. This way, I can toggle them quickly in the editor, as well as dynamically change them during runtime later on.

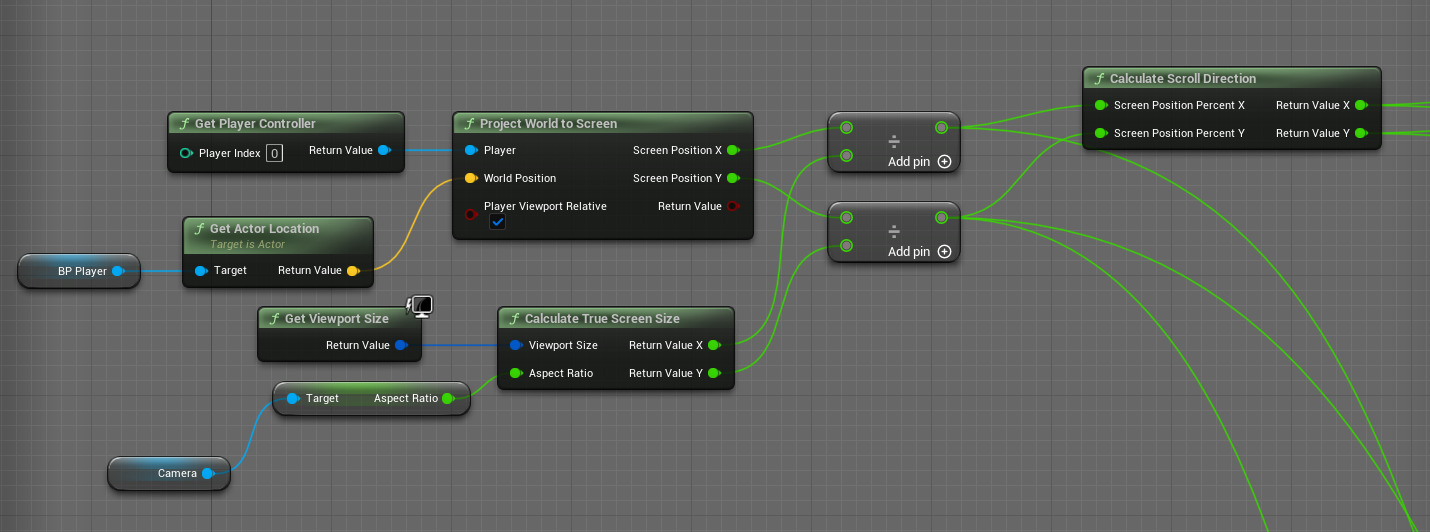
The following Blueprint calculates the player’s normalized screen-space position, checks it against the threshold we’ve defined in the ScreenScrollThresholds struct. If the player has passed the threshold, then the different between their position and threshold is multiplied with the scroll speed and added to a vector that will move the camera.

Then, we can use the direction that we calculated to move the camera along the path. I store a variable called Last Distance on the Blueprint, then use the calculated direction to add to the stored distance, and use the FInterp To node to smoothly interpolate to the destination.
Optimization
The above node graph is pretty tangled and messy. That and the fact that it will be evaluated every tick means that re-writing it into C++ code would give us some performance back. So I rewrote the camera pawn into a C++ AFantasyCamera class to be inherited from, and implemented a few functions to replace parts of the node tree.
 Here I wrote the
 Calculate True Screen Size node and Calculate Scroll Direction node.
- The first node was necessary because the default
Get Viewport Sizenode does not account for forced aspect ratios, which I will have for this game to replicate the Metal Slug feel. - The second node basically compacts all the math nodes from the previous node tree down to one node, making the graph much more readable.
FVector2D UFantasyCameraUtils::CalculateTrueScreenSize(FVector2D ViewportSize, float AspectRatio)
{
  float TrueX = ViewportSize.X;
	float TrueY = ViewportSize.Y;

	float ViewportAspectRatio = ViewportSize.X / ViewportSize.Y;

	if (ViewportAspectRatio > AspectRatio)
	{
		TrueX = ViewportSize.Y * AspectRatio;
	}
	else
	{
		TrueY = ViewportSize.X / AspectRatio;
	}

	return FVector2D(TrueX, TrueY);
}

FVector2D AFantasyCamera::CalculateScrollDirection(FVector2D ScreenPositionPercent)
{
	float ScrollLeft, ScrollRight, ScrollUp, ScrollDown;
  // ScreenScrollThresholds is a class instance variable
	ScrollLeft = UKismetMathLibrary::FMax(ScreenScrollThresholds.LeftThreshold - ScreenPositionPercent.X, 0);
	ScrollLeft *= -(uint8)ScreenScrollThresholds.EnableScrollLeft;

	ScrollRight = UKismetMathLibrary::FMax(ScreenScrollThresholds.RightThreshold - (1 - ScreenPositionPercent.X), 0);
	ScrollRight *= (uint8)ScreenScrollThresholds.EnableScrollRight;

	ScrollUp = UKismetMathLibrary::FMax(ScreenScrollThresholds.UpThreshold - ScreenPositionPercent.Y, 0);
	ScrollUp *= (uint8)ScreenScrollThresholds.EnableScrollUp;

	ScrollDown = UKismetMathLibrary::FMax(ScreenScrollThresholds.DownThreshold - (1 - ScreenPositionPercent.Y), 0);
	ScrollDown *= -(uint8)ScreenScrollThresholds.EnableScrollDown;

	return FVector2D(ScrollLeft + ScrollRight, ScrollUp + ScrollDown);
}
Secondary Tracking
Just tracking the player on one axis isn’t enough. What if the level has some verticality to it? What if there is a ramp or a set of stairs? So, we’d need to be able to move the camera to track the player outside the path defined by the spline. To implement this, I made use of the thresholds for a direction other than the designed scroll direction, and move the camera in its local space on the X and Z (horizontal and vertical) axes. To prevent the camera from straying off too far, I also added a Box2D variable to define 2 a bounding box on the camera’s local movement.
Now we have a camera that will follow a path as it tracks the player on any direction of our choosing. To visualize these thresholds and debug them, I’ve added some simple debug HUD elements to visualize the thresholds

The white lines demark the threshold at which the camera will move
Auto Scroll
We may want to have scenarios where the player is forced to move in a direction as the camera automatically moves. With what we’ve built above, doing an autoscroll mechanic is easy. Just disable scrolling, and increment the internal variable for the camera’s path input key a script.
Building the Tools
Having these cameras stringed together is nice and all, but we’re working on a 2.5D game in a 3D engine, so what we see in the viewport won’t be exactly what the player will see. We’d like to easily preview what the level will look like during gameplay from the camera’s POV, which will speed up level design and iteration since you won’t have to re-run the game every time.
This is the basic tool I built to help with previewing how the level will look during gameplay

Preview of the active camera
The slider allows the level designer to scroll along the camera’s path, and quickly switch between the current and next camera.
This system works on assigning the tag Camera_n to the nth Camera in the intended sequence of cameras. Then using that to find the next camera or previous camera to switch to. But this introduces a lot of repetitive assigning of tags whenever we want to add a new camera to the scene
Managing Tags
To make managing the tag less tedious, I’ve modified BP_CameraPawn’s Construction Script check if itself has a Camera_n tag already, or if another camera in the scene has the same tag. If so, find the tag with the highest n value, then assign to itself Camera_<n+1>
Future Works
This is my first time building any kind of system inside Unreal, so there are a lot of room for improvements.
- We could take inspiration from Insanely Twisted Shadow Planet(ITSP) and introduce a point of interest system for more dynamic camera movements.
- Tools to easily author and adjust which camera should transition to which camera, and the conditions under which they transition.
- I didn’t quite understand the underlying mechanics of the Blueprint system, so there are definitely inefficient aspects about my implementation
- For instance, there are places where I can use an impure function to cache my results, instead of having to reevaluate the same thing over and over
- There are other places where I can rewrite the nodes as C++ code to make the graph more readable.
- To bound the player and other objects inside the camera view we could have the camera output X and Z bounds (remember all entities are on Y=0), and have the entity use those values inside their own Blueprints.